Showing posts with label Inexpensive Ideas. Show all posts

Monday, May 25, 2015

Black Bean Brownies

Looking for a healthy, but sweet and delicious alternative to your typical dessert?  Check out this fantastic recipe for black bean brownies.  Oh, and of course, inexpensive!! :)

I've been making these for over a year now, and they really are good!  My kids and husband all approve of these brownies, which if you know my family, this means a lot! :) 


It's so great not to feel guilty giving your kids a dessert before bed.  These brownies are packed full of protein with no refined sugar!  My only tip is to cook them a little longer then the recipe calls for.  I cook them for 22 minutes, and they come out perfect every time!!

Here's the full recipe:

http://chocolatecoveredkatie.com/2012/09/06/no-flour-black-bean-brownies/


If you like what you just read please click to send a quick vote for me on Top Mommy Blogs- The best mommy blog directory featuring top mom bloggers

Wednesday, May 20, 2015

DIY Teacher Gift

It's that time of year again!  Summer is coming, school is ending, and it's time to thank those teachers for spending all year teaching our kids.  I wanted to come up with a gift that was practical, something the kids could help with, and frugal at the same time.  So here it is, a Pen Planter!


This is really simple, but I think really cute.  Here's what you need:


1 Empty can
26 Pens (plus or minus depending on the size of your can)
Ribon
1 Plant (any plant will be fine!)
Optional:  Measuring tape and marker


All you need to do is line the can with the pens.  Place the tabs of the pens inside the can, so they are secure.


I had purchased three 10 packs of pens at the Dollar Tree, and used 26 on the can.


Then carefully plant your flower inside the can.  You can rinse off any excess dirt with some water.  And finish it off with a pretty bow!  (Optional: You can also draw ruler marks on your ribbon to make it look like a tape measure, which would be really cute!  But, when I tried this with my ribbon the maker ran.)


And there you have it!  A practical teachers gift for under $10!  I know any teacher would be proud to display this on his or her desk!! :)


If you like what you just read please click to send a quick vote for me on Top Mommy Blogs- The best mommy blog directory featuring top mom bloggers

Monday, May 4, 2015

Dollar Tree Wall Decor

 
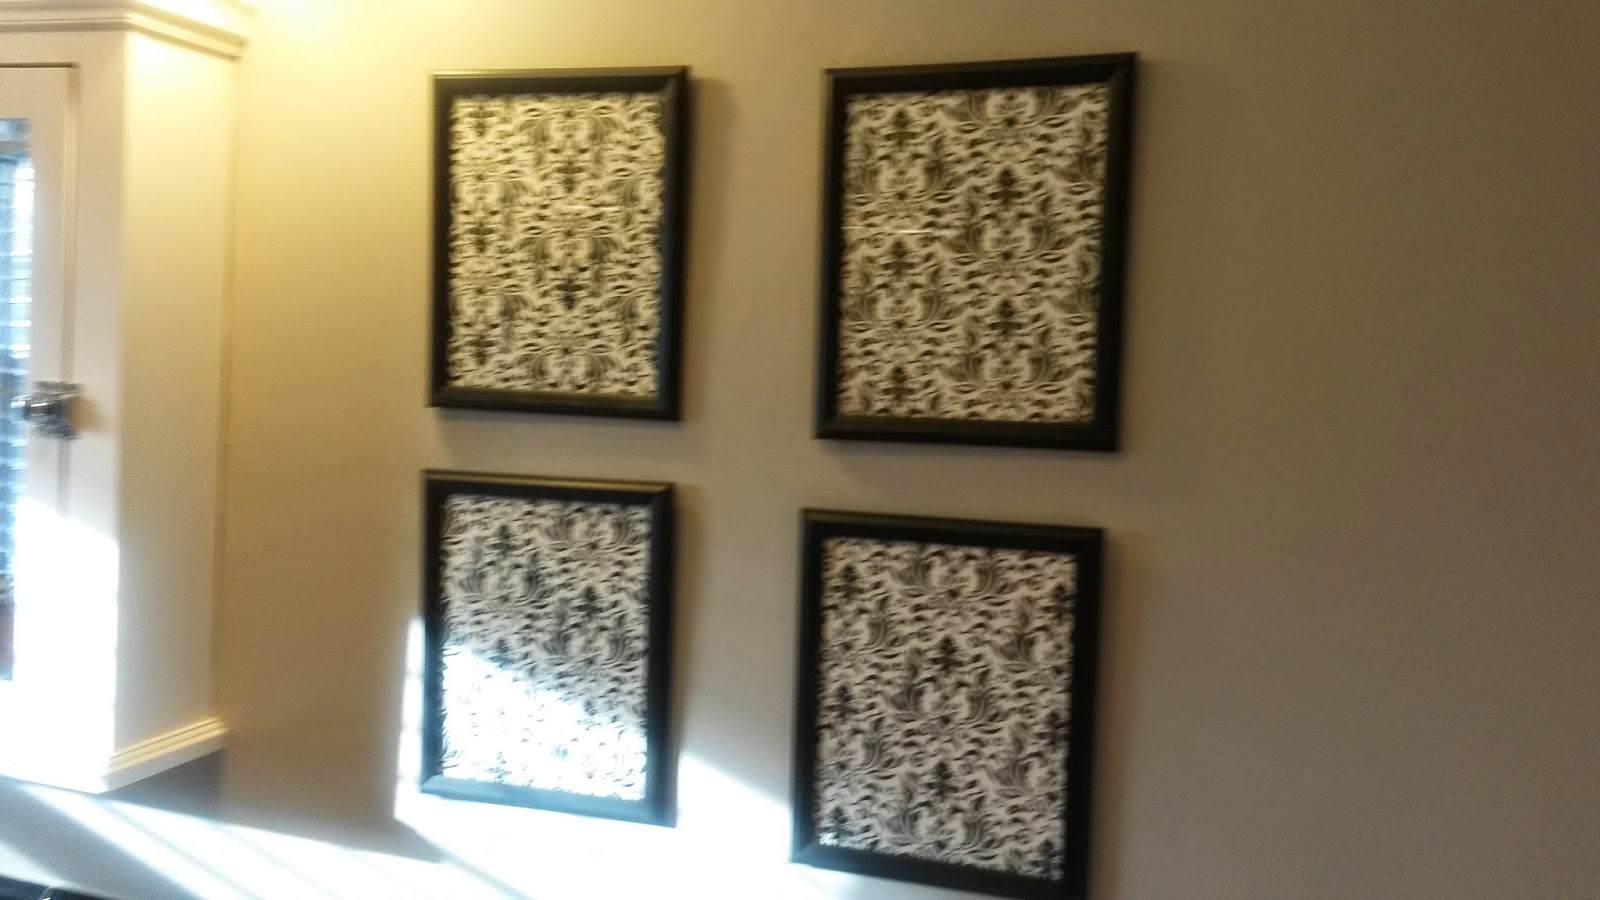
Sprucing up a room will new pictures can be expensive.  With our family being on such a tight budget, every purchase matters!  That's why instead of purchasing expensive new pictures, I checked out The Dollar Tree.  With a little imagination and a DIY attitude almost anything is possible at The Dollar Tree!

Check out my DIY set of 4 picture frames for $6 (plus tax)!

I wanted some black and white art work for my bathroom, so I wondered around The Dollar Tree and found some black picture frames and then found black and white place mats.


I cut out the place mats to fit the frames, and was able to fit 2 place mats per frame.


And there you have it.  A quick, inexpensive, pretty update to my bathroom!  Hope I have inspired you to do some DIY Dollar Tree art work as well!!

If you like what you just read please click to send a quick vote for me on Top Mommy Blogs- The best mommy blog directory featuring top mom bloggers

Thursday, April 2, 2015

DIY Easter Bunny Picture Frame

With Easter only a couple days away, I decided to do some Easter crafts with the kids today.  My little guy and I talked about it, and he decided that he wants to make an Easter present for Grandma.  So this is what I came up with:


What you'll need:
  • Any kind of heavy paper (I used photo paper I purchased at the Dollar Tree)
  • Cotton Balls 
  • Pink and White construction paper
  • Glue
  • Scissors
  • 4x6 photo


Take your heavy paper and trace the 4x6 photo on the back.  Then cut about 2 inches from the line that you traced to make the frame.  Cut out the pink ears and white middle ears, just a bit smaller.


Glue the ears together, and then glue to the top of the frame.  I then put some glue dots around the edge so my little guy could glue on the cotton balls.


Let that dry and then add the photo of your choice.  Just tape it onto the back of the frame.


And there you have it.  A simple, fun and easy DIY Easter Bunny Picture Frame any Grandma, Grandpa, Aunt or Uncle would be proud to hang on their frig!

Happy Easter to everyone!

If you like my post, please remember to vote below!  Thank you again!


If you like what you just read please click to send a quick vote for me on Top Mommy Blogs- The best mommy blog directory featuring top mom bloggers

Monday, March 16, 2015

FREE Cone Day Today!!

FREE Cone Day Today at Dairy Queen!!


http://www.dairyqueen.com/us-en/

Make sure to check with your local Dairy Queen to make sure they are participating!

If you like what you just read please click to send a quick vote for me on Top Mommy Blogs- The best mommy blog directory featuring top mom bloggers

Friday, March 13, 2015

2 Ingredient Pancakes


These are the easiest, most kid friendly, inexpensive and delicious pancakes you have ever had.  If you're a banana lover that is.  Oh...and did I mention, gluten free!

My kids are pretty picky eaters, so when they started eating these pancakes, I was pretty excited! This is a super easy recipe, something I always appreciate in the morning!

Ingredients:

2 Eggs
1 Banana


 Take the banana smash it with a potato masher or just a fork.  Then add the eggs.


Whisk the eggs and bananas until they are all mixed together.  The batter will look a little lumpy, that's fine.


Then cook in a non-stick pan, just as you would a typical pancake.  (I put a little bit of butter in the pan, just for taste.)  They are more like crepes, thin and fragile, so be careful when flipping them.


I get about 5 medium size pancakes out of one recipe.  My kids love them with a little bit of maple syrup, or even some jelly.


Hope your family loves these as much as we do!  Enjoy!!


If you like what you just read please click to send a quick vote for me on Top Mommy Blogs- The best mommy blog directory featuring top mom bloggers

Monday, March 9, 2015

DIY Wood Polish


Ever wonder what's in your wood polish you buy at the store?  Lots of chemicals that you may not want to breath in after looking them up!!

I've been doing some research and found a very effective and inexpensive DIY Wood Polish recipe.  I found the recipe at Fabulous Farm Girl, a great website, totally worth checking out!!

Here's what you'll need

1 3/4 Cup Water
1/2 Cup Vinegar
2 Tablespoons Olive Oil
20 Drops Lemon Essential Oil
1 Spray Bottle

*I purchased the Lemon Essential Oil on Amazon for $6.64 + FREE shipping on Amazon.  NOW Essential Oils 1 fl. oz.


Take the ingredients and mix in a bowl with an immersion blender.  (If you don't have an immersion blender, you just mix it well with a  whisk or in a mixing bowl with the whisk attachment).  Mix until all ingredients have become incorporated.


Then pour into an empty, clean spray bottle.  (I purchased this at my local Dollar Tree.)


There you have it!  And it works!!  Make sure to shake well before using, it separates a little on the top.  It also makes the whole room smell fantastic when you clean!  


If you like what you just read please click to send a quick vote for me on Top Mommy Blogs- The best mommy blog directory featuring top mom bloggers

Saturday, March 7, 2015

St. Patrick's Day Craft


St. Patrick's Day is just around the corner, so I decided to do a craft with my little guy and decorate the house.  We decided to do a "St. Patrick's Day Rainbow Wreath".

What you'll need:

Paper Plate
Macaroni (any kind you have)
White Tissue Paper
Glue
Crayons
1 Package of paper Shamrocks from your local dollar store (or just cut them out from green paper)
Food Coloring

**I bought a package of paper Shamrocks at the Dollar Tree.  They came in packs of 12, 6 with glitter, and 6 plain.  This is the only item I purchased for this project, everything else I had in my house.

This is really a 2 day project.  First take the macaroni and put in a plastic bag with a few drops of green food coloring, and shake around to get all of the macaroni covered.  This dries pretty quickly, in a about 15 minutes.  Let it just dry in the bag, with the bag open.


Then take your white tissue paper.  Cut out 6 strips about 10 inches long, and about 10 smaller squares pieces.  Place 1/4 cup of water and 3-4 drops of food coloring in the bowl, and add a few strips and squares of tissues per color.  I used, yellow, blue, green and red.


Place the wet tissue paper on wax paper, and let dry over night.


The next day, take the paper plate and cut the center out to make a wreath.  Then let your little ones draw on it with crayons.


We then glued the shamrocks onto the wreath.  Next we glued the pasta and the square paces of tissue paper.  When that dries, turn the wreath over and glue the long pieces of tissue paper on, to make it look like a rainbow.


And there you have it, a pretty, inexpensive and FUN St. Patrick's Day wreath!  Enjoy!


If you like what you just read please click to send a quick vote for me on Top Mommy Blogs- The best mommy blog directory featuring top mom bloggers

Friday, February 27, 2015

Roasted Honey Cinnamon Chickpeas

Since having my baby over 1 year ago, I have decided it is time to take back my body!  I can't blame my extra weight on baby weight anymore, I can now blame cookies and cupcakes!

I have a wicked sweet tooth, and I decided rather then totally cutting out sugary treats, I would replace them with something healthier.  Below is a recipe I recently tried, and is soo good!

Roasted Honey Cinnamon Chickpeas:

http://www.popsugar.com/fitness/Roasted-Honey-Cinnamon-Chickpeas-27908653


This was such an easy recipe and inexpensive to make!!  And really good!  I keep them on the counter and munch on them all day, totally curves my urge for sugar!

If you like what you just read please click to send a quick vote for me on Top Mommy Blogs- The best mommy blog directory featuring top mom bloggers

Tuesday, February 24, 2015

DIY Air Freshener

Living with two children, a husband and a cat, my house can become a little smelly at times!  Air fresheners can be expensive and often times just mask the underlying smell.  So I did some research and experimenting, and came up with an inexpensive and fresh smelling DIY air freshener. 

Here's what you'll need:

1 Mason Jar
1 Cup Baking Soda
Essential Oil of your choice
Gift Bag
1 Toothpick

Take the mason jar and fill with baking soda.  Then add the essential oil of your choice; I used Lemongrass.  Depending on the size of your room and the strength of the sent you want, you can add more or less oil.  I put in 10 drops in my living room, and it adds a fresh sent when I walk in.  I suggest you start with 5 drops and add more if you want.

Once you have your baking soda and essential oil in the mason jar, it's time to decorate!  This is a great way to re-purpose old gift bags!  Take the gift bag and cut out a piece a little larger then the top of the mason jar.  Then place the lid over the bag, and trace the inside of the lid.


Place the paper in the lid, and screw on.  Then take the toothpick, and poke holes through the gift bag.


And there you have it, a great smelling, inexpensive DIY air freshener!!  The baking soda absorbs any smells and the lemongrass essential oil really makes the room smell great!


*I purchase the lemongrass essential oil on Amazon.  Here is the link,

http://www.amazon.com/gp/product/B000MGSJBY?ie=UTF8&camp=1789&creativeASIN=B000MGSJBY&linkCode=xm2&tag=staathommom06-20


If you like what you just read please click to send a quick vote for me on Top Mommy Blogs- The best mommy blog directory featuring top mom bloggers

Thursday, February 19, 2015

Easy Meatless Gluten Free Dinner

During Lent my family does not eat meat on Fridays.  For me, it's a small sacrifice that I traditionally practice.  However, finding meatless dishes my whole family enjoys is a bit more difficult, especially on a budget.  Here is one I came up with:

Crust-less Egg and Veggie Bake

Ingredients:

8 Eggs
1 Head of Broccoli
1/2 Pint of Grape Tomatoes
1/2 Cup Grated Cheddar Cheese
Salt and Pepper to Taste

Chop the broccoli into bite size pieces and cut the grape tomatoes in half.  Saute in olive oil and salt and pepper to taste.  Saute until tender.


Let cool for about ten minutes and then place the vegetables in a pie pan.  Then mix the eggs together and add cheese.  Pour egg and cheese mixture over the veggies.


Bake for about 30 minutes, or until the eggs are cooked through.  Hope your family enjoys this as much as we did!  Enjoy!!


If you like what you just read please click to send a quick vote for me on Top Mommy Blogs- The best mommy blog directory featuring top mom bloggers